May 02, 2013
24 Everyday Uses for Mayonnaise!

1. Does your piano have dull ivory keys? Brighten those dull keys up with a little dab of mayonnaise! Rub a little bit of mayonnaise on each key, and leave on for about 5 - 7 minutes. Wipe off, and buff with a micro fiber towel for brighter keys!
2. Got Dry or Brittle Hair? Mayonnaise will soften and smooth your hair for a sleek look. Shampoo and towel dry your hair normally. Then using a wide tooth comb, comb in about a tablespoon of Mayonnaise, making sure to coat each strand of hair. Leave in for about an hour. Rinse, and shampoo and condition once more!
3. Rough Patches of Skin? Apply a small dab to those rough elbows, knees, and feet. Leave on for about 15 minutes. Then simply wipe with a damp towel. Moisturize as normal.
4. Got little ones that "accidentally" drew on the wall with their crayons? Simply apply a small amount of mayonnaise to the colored area, leave on for 5 to 10 minutes, and watch the coloring magically disappear! Wipe down with a damp cloth.
5. Weak Nails? Soak your fingernails, and cuticles in some mayonnaise for 10 minutes a week. Rinse and after about a month your nails will be 50% stronger! Mayonnaise will also help to reduce future hangnails!
6. In a Sticky Situation? Mayonnaise is great for removing sticker residue, sap, and tar! Cover the affected area with mayonnaise, let sit for a few minutes, then wipe off with a damp cloth. Apply a small amount of lemon juice to your mayonnaise mixture for added sticky cutting strength.
7. Water Rings? If you've got water rings on your wooden furniture, use a small amount of mayonnaise on a dry cloth to buff out the rings!
8. Stained Furniture? Just like the crayon effect, apply a small amount to the affected area, and let sit for 5 to 10 minutes. You may want to try it first in an inconspicuous spot before applying to something that is out in the open for all to see, as sometimes, you may end up with an oil stain.
9. Removing rings. Mayonnaise is great for being able to remove a ring from your finger!
10. Polish Your Houseplants. Yes it's true, people actually do polish their dull house plant leaves! I don't, well because I am lacking the green thumb gene entirely! However, if your houseplants have seen better days, and are looking dull. Try dabbing a small amount to the leaves, and buff.
11. Kill Head Lice. I wish my mom had known about this one when I was little. Yes, when I was a kid, I had head lice, and boy did I hate those chemicals! Massage mayo into the scalp, covering all the hair as well. Apply a shower cap, and leave in overnight. Wash out mayo the next morning, and using those fine tooth combs, comb the scalp. Repeat every 2-4 days if needed. It really does work!
12. Fix Cracked Furniture. If you have small cracks in wood furniture, apply mayo to the crack, filling it up. Wipe off any excess. Leave mayo to set for several days. The proteins and oils from the mayo will make the wood swell up, thus shrinking the crack.
13. Relieve Sunburn. Don't have Aloe? Apply a thin layer of mayonnaise onto the sunburned area. It moisturizes and cools the skin!
14. Remove permanent Marker from Skin! Apply mayo to mared up skin let sit for 5 minutes and wipe off with a damp cloth. Permanent No More!
15. Give Yourself a Facial. No more need for expensive creams. Apply a thin layer to your face, and leave on for about 20 minutes. Wipe with a damp cloth, and you'll be amazed at how well your skin looks!
16. Use Mayonnaise as a substitute for Eggs. When you are baking, and realize you have no eggs... Simply add 3 tablespoons of mayo as a substitute!
17. Remove Fingerprints from Stainless. Wipe a thin layer of mayonnaise on your stainless stell appliances, and gently buff away!
18. No More Squeaky! Got a squeaky hinge? Apply a small amount to that hinge and open and close the door a few times to quiet the squeak!
19. Gum? Get gum out of hair! Take a small glob of mayonnaise and rub all around the gum with your fingers, gently sliding the gum down the strand of hair.
20. Polish Your Silver. Giving your fine silver a once over with a buff using mayonnaise on a dry micro fiber towel, and bring the shine back to all your silver.
21. Have some dried up paint drips on door knobs, windows, or your skin? Apply a small amount of mayonnaise to the drip, and let sit for 3 - 4 minutes. Wipe clean. It's less harsh than those over powering paint thinners.
22. Use Mayonnaise to coat fish fillets or chicken breasts to lock in moisture, and help your desired breading adhere.
23. Use mayonnaise as a base for your tater sauce
24. Combine mayonnaise and a teaspoon of basil pesto for a zesty chicken sandwich spread
April 24, 2013
Stop Poisoning Yourself & Switch to DE!

We began using this in our home just about 2 years ago, and the more I read, the more amazed I am by this universal product.
First, let me strongly express that there are 2 different grades of Diatomaceous Earth. Food Grade and Pool Grade. Pool grade DE is toxic, and can be extremely harmful to pets and people.
For the purpose of this post, I will only be discussing FOOD GRADE DE.
Food Grade Diatomaceous Earth has loads, and I mean loads of benefits and uses. I do believe that if this was more widely available in stores, many of the pesticides, and flea control products would lose millions of dollars and be out of business entirely!
How does Food Grade DE work? It works by physical action, not by chemical action, and because of that, garden insects NEVER, EVER become immune to it. It works on all exoskeletal insects. As insects and pest walk across the DE, the fine powder gets into the joints of them, scratching off the insect's waxy coating, and dehydrate it.
Believe it or not, Food Grade DE is in fact widely used, and IS FDA approved for humans and animals.
Food Grade Diatomaceous Earth is 89% Silica, which is one of the most important trace element in human health, according to Dr. Barbara Hendel.
What are the benefits and uses? Get ready for this amazing list!
♦ Pest Control. Food Grade DE is used in the control of Roaches, ALL types of Ants, Silverfish, bedbugs, flies, scorpions, box elder bugs, crickets, fleas, ticks, mites, lice, and many other types of insects. Best of all it will not harm earthworms!
♦ Flea Control. Sprinkle in a dry yard as well as on your pets. In order for this to work in your yard, it is best to use two - four times a month
♦ Metal Cleaner. Make a paste with water and use to as a metal polish.
♦ Use the same water and DE paste and use as a body scrub.
♦ Whiter Teeth? Yep. Sprinkle a small amount on your toothpaste and you'll notice a "just went to the dentist" feeling when your done brushing!
♦ Can be used int he same way baking soda is when reducing odor in the freezer or refrigerator. Just replace every two weeks or so.
♦ place a cup of DE inside a tube sock, tie at the top, and place inside foul smelling shoes when not in use, for fresher smelling shoes!
♦ Cover a newly stained area on carpets with DE, slightly work into carpet, let stand for at least 2 hours, then vacuum up. Works great on new pet stains!
♦ Out door garbage bins? Sprinkle a cup or so in the bottom of your cans to deodorize. This will also kill any bugs and larvae that are present.
♦ Food Grade can reduce arthritic inflammation in your elder pets joints.
♦ Depending on the size of your pet, a 1/4 to 1 teaspoon daily in the food will also act as an organic dewormer for many types of internal parasites.
♦ Although there has yet to be any real studies done to prove this, many people who take DE internally claim their metabolism has increased, and they have more daily energy.
♦ Although, I cannot speak for any of THESE uses, there is a website that is receiving loads of emails from their consumers claiming all kinds of health benefits, many of which I believe.
Too Good To Be True? I used to think it was, until I started to use it and see for myself the reults we were getting for just flea and tick control!
April 20, 2013
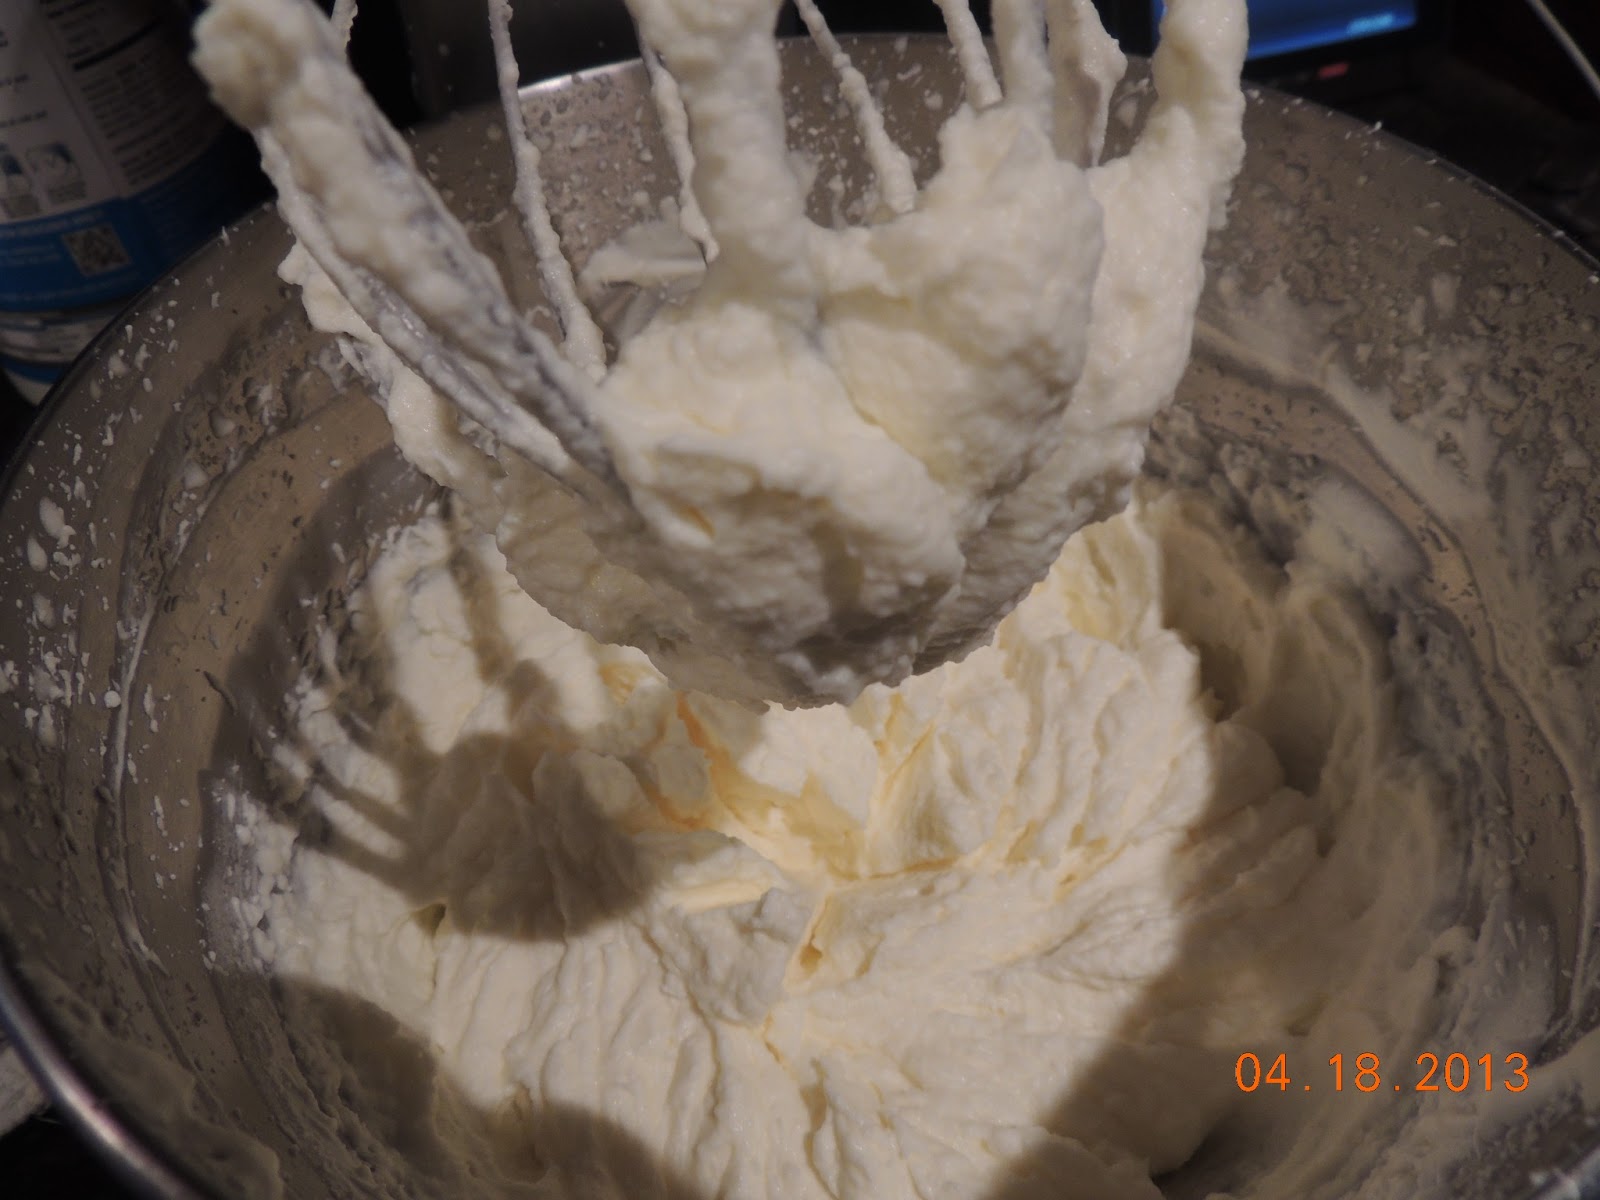
Easy Homemade Butter - No Churn Needed!




January 12, 2013
Hidden Away Jewelry Organization! ~ Easy DIY!
A while back I had scored a beautiful oak jewelry armoire at a consignment shop for under $70. Well having been through a house fire, I lost it, and most everything inside. So in the recent months, I have been on a "full on assault" to find another one. In the mean time, the majority of my jewelry is being stored in a Ziploc storage container. Hot, right?
Well that was until I had an idea.


October 25, 2012
Air Wick's New Color Changing Candle!

October 16, 2012
What Is DE? One Word - Amazing!
We began using this in our home just about 2 years ago, and the more I read, the more amazed I am by this universal product.
First, let me strongly express that there are 2 different grades of Diatomaceous Earth. Food Grade and Pool Grade. Pool grade DE is toxic, and can be extremely harmful to pets and people.
For the purpose of this post, I will only be discussing FOOD GRADE DE.
Food Grade Diatomaceous Earth has loads, and I mean loads of benefits and uses. I do believe that if this was more widely available in stores, many of the pesticides, and flea control products would lose millions of dollars!
How does Food Grade DE work? It works by physical action, not by chemical action, and because of that, garden insects NEVER, EVER become immune to it. It works on all exoskeletal insects. As insects and pest walk across the DE, the fine powder gets into the joints of them, scratching off the insect's waxy coating, and dehydrate it.
Believe it or not, Food Grade DE is in fact widely used, and IS FDA approved for humans and animals.
Food Grade Diatomaceous Earth is 89% Silica, which is one of the most important trace element in human health, according to Dr. Barbara Hendel.
What are the benefits and uses? Get ready for this amazing list!
♦ Pest Control. Food Grade DE is used in the control of Roaches, ALL types of Ants, Silverfish, bedbugs, flies, scorpions, box elder bugs, crickets, fleas, ticks, mites, lice, and many other types of insects. Best of all it will not harm earthworms!
♦ Flea Control. Sprinkle in a dry yard as well as on your pets. In order for this to work in your yard, it is best to use two - four times a month
♦ Metal Cleaner. Make a paste with water and use to as a metal polish.
♦ Use the same water and DE paste and use as a body scrub.
♦ Whiter Teeth? Yep. Sprinkle a small amount on your toothpaste and you'll notice a "just went to the dentist" feeling when your done brushing!
♦ Can be used int he same way baking soda is when reducing odor in the freezer or refrigerator. Just replace every two weeks or so.
♦ place a cup of DE inside a tube sock, tie at the top, and place inside foul smelling shoes when not in use, for fresher smelling shoes!
♦ Cover a newly stained area on carpets with DE, slightly work into carpet, let stand for at least 2 hours, then vacuum up. Works great on new pet stains!
♦ Out door garbage bins? Sprinkle a cup or so in the bottom of your cans to deodorize. This will also kill any bugs and larvae that are present.
♦ Food Grade can reduce arthritic inflammation in your elder pets joints.
♦ Depending on the size of your pet, a 1/4 to 1 teaspoon daily in the food will also act as an organic dewormer for many types of internal parasites.
♦ Although there has yet to be any real studies done to prove this, many people who take DE internally claim their metabolism has increased, and they have more daily energy.
♦ Although, I cannot speak for any of THESE uses, there is a website that is receiving loads of emails from their consumers claiming all kinds of health benefits, many of which I believe.
Too Good To Be True? I used to think it was, until I started to use it and see for myself the reults we were getting for just flea and tick control!
September 28, 2012
Winter's Coming! Save on Your Heating Costs This Year!


July 26, 2012
ScotchBlue DIY Bulletin Board Project


choice
2. Select a coordinating chalkboard paint
3. Paint the inset with magnetic black paint.
4. Create desired layout and lightly line out with pencil. Use a 6” speed square to insure boxes are truly square
TIPS:
• Play with the orientation as well as color options. Design may work both vertically and
horizontally
• Everything is fair game – think of all textures and colors. When it feels “right” you will
know
5. Once design has been laid out with a section for chalkboard color and a section for cork, isolate and
mask out areas to be painted using ScotchBlue Painter’s Tape.
TIP
• When taping out along a pencil line, follow to the outside of the pencil mark – so you will
actually paint the line out instead of having to comeback and clean up a pencil mark. A big reason why I say “lightly” mark your layout with a pencil is two-fold. A) By pressing hard
with the pencil you can dent or bruise the grain. B) By lightly marking with a pencil you be
able to paint over it easily to “erase it”.

the center of your paint area toward the edges. End with brush strokes in one direction and keep a
wet edge (see below for description) as you work the paint.
TIPS:
• Lightly wet the foam brush before you use it and pat dry it so it is merely damp when you
dip it into the paint. Moisture in the foam brush will allow the foam pad to have flexibility
and will also make for easier clean up as the paint will always be on a “wet edge” and
won’t dry up and crust over quickly
• Use a foam brush for a nice even application. One must be careful and work with a light
hand as these brushes are easily damaged and can create a mess when they start to fall
apart in your paint. However, in small quick art projects foam brushes are great. Their
biggest advantage as a painter? They don’t leave brush marks when the paint dries!
• Let paint dry well before applying next coat. It’s always better to build up coats as
opposed to applying a thick layer of paint. Paint applied in one thick coat will have a
tendency to sag or droop or drip
7. Once paint has fully dried, gently pull tape back on itself and by angling the edge back at 45 degrees to reveal crisp edges and lines and corners.
To help move along time, I often use a fan to coax the paint along with its drying time.
March 16, 2012
How We're Rebuilding... Making It Easy


December 29, 2011
My Newest Gadget

Okay, so this may be a little more of a appliance than a gadget, but I love it just the same! My wonderful husband bought me the Kitchen Aid Classic Mixer for Christmas this year, and my reaction was one of awe. I was so not expecting this, but have wanted one of these for years. These mixers are the "work horse" of all mixers, and it hasn't left the counter since I took it out of the box. By the end of the week, there will be a permanent home for this on the counter.

I couldn't believe just how many different attachments there are for this machine, and trying to decide which ones to get first is a bit overwhelming. We're heading out later today to go and get one or two attachments, and then back home to really start to cook!
Getting this mixer this year is what I think I needed. I have been wanting to cook more from scratch, and not having the right tools, just makes cooking more of a chore, rather than something I enjoy. I love to cook, I just hate having to "make due" with less than par appliances and tools. I am pretty sure, you'll start to see more recipes here on Brandy's Big Bargains!
Do you have a Kitchen Aid Mixer? What are some of your favorite recipes to make? Do you have any tips to get the most out of it? Leave a comment and let me know!
August 25, 2011
A New Favorite App ~ That Every Couponer Needs!


August 06, 2011
The Painting Moves Forward

The weather here in Rhode Island has been at times just plain too hot to paint, or to wet to paint. We had put off painting until these past two days, where we began to start the front of the house. Of course before you can paint, you first have to scrape. So my husband has been scraping away, every chance he gets, while I have been removing all the shutters, priming the areas that have been scraped, and then painting the primed areas. ( It sounds like I am doing more, but believe me the scraping... it's tedious, long, hard, and much more muscle is needed for this process.)
(He hates painting, and I hate the scraping, so I guess we make a really perfect team for this project!)
We knew that painting this house was going to be a big project, we just didn't realize it was going to be this big! However, each side of the house that gets finished, we become more and more anxious to finally complete this project. The color that we choose is a deep hunter green, and the more sides of the house that gets covered the more I love this color.
I will say, that the entire back and one side of the house, has now been completed. I have been using an electric paint sprayer, and although it puts on a nice even coat of paint, it didn't seem like it was any quicker than using a paint brush.
That was until I got my newest favorite tools for the house...

Fast? Fast doesn't begin to explain this attachment. You get a nice even coat of paint in about 1/8 th of the amount of time with an electric paint sprayer. I can honestly say I am actually looking forward to getting out there each morning and using this tool.
My husband laughs at me, he calls me his "Gadget Queen" because I buy him these tools, like the air compressor, and I think I have gotten more use of it so far.
One of the best features of this little gadget was the price. At just under $50, and $1.78 for the connector, it is probably the best thing we have purchased for this project, and trust me, we have made a lot of purchases, and done a lot of returns in trying to find the best and easiet way to accomplish this task.
So if you're getting ready to start painting your own home, and are doing it yourself to save money, I highly suggest you go with an air compressor & paint sprayer like the Kobalt Paint gun, as you will be saving yourself so much time. I only wish we had bought this paint gun in the first place!
Now, off to go and paint!
March 23, 2011
Spring Cleaning Part 1
 I would like to say that Spring is finally here. Though it may be technically here, here in New England, we are expecting accumulating snow over night tonight. Great, just what I wanted to hear, more snow.
I have been receiving emails about Spring cleaning, organizing, and the like. Many of which are readers asking me, how I do it, what are some suggestions, and what they can do, to make it easier.
Cleaning, is not something that I look forward to, ever. However, for some reason both Spring, and Fall cleaning, is different. It's cleansing. It's a time to refresh, a time to regroup. It really is the only time that once I get started, I don't like to stop. I will keep going until it is 100% completed.
With that said, I hope these tips may help you in your Spring cleaning.
1. Start from the room where you don't spend that much time in, our that people don't see too often. By starting here, you have the most amount of energy. If you save these types of rooms for last, you are more apt to say to yourself, "Well, no one really sees this room." and before you know it, Fall is here.
2. Put 3 containers in the center point of your house, one for garbage, one for recycling, and one for donating. When you start pulling items out from the rooms, place them in one of these bins. Don't hide these containers away, by keeping them out in the open, you'll have a constant reminder of what you need to do.
3. Three second rule. If you can't decide whether or not you need or will use the item within three seconds, it's time to get rid of it. I am a big stickler for the 3 second rule, just ask my girls!
4. Display those memories. Boxing up photos, or memorabilia takes up valuable closet space. Instead of hiding them away, get yourself a memory frame from a local craft store, and display those items proudly. This is also a great way to change up the feel of a room.
5. Want the rooms to smell fresh and clean when your done? Try this great dryer sheet tip from All Free Crafts.
Dryer Sheet Flowers
Supplies:
♦ dryer sheets
♦ acrylic craft paints
♦ green chenille stems or pipe cleaners
♦ perfume or essential oil
♦ vase or jar
Dryer Sheet Flowers
Instructions:
~ Take two or three dryer sheets and fold them lengthwise in an accordion (in and out), using about 1/2 to an 1 inch strips.
~ Fold in half and slip the top of the pipe cleaner through, then twist the pipe cleaner tightly. The rest of the pipe cleaner becomes the flower stem.
~ Here's the fun part: pull the layers apart and watch a flower appear. Add a few drops of perfume or essential oil if your using used sheets or sheets with no fragrance.
~ Place a dollop of paint on a clean meat tray, and add some water. Gently brush the top edges of the flower.
~ Repeat the painting in different colors, display on dresser, or on a shelf in each room
6. Do some research on items that you wan to donate. Here are some online resources to help you decide where you want to donate your unwanted items.
Cell Phones:
~ 911 Cell Phone Bank - In May of 2004, the 911 Cell Phone Bank was created to provide an ongoing and readily available source of emergency cell phones and funds to meet the unexpected and urgent needs of participating law enforcement and affiliated victims services agencies.
~ Swagbucks - Earn Swagbucks when you turn your old cell phone into Swagbucks. You have to determine which phone you have, then print out a prepaid label, send it in, and wait for your points to accrue.
~ Wish Upon A Hero - Send your old cell phones and used ink/laser cartridges to Wish Upon a Hero. We will collect them and ship them to Funding Factory where they will recycle them and we will earn donation dollars. The money generated from the phones and cartridges will go towards granting wishes.
Computers:
~ Computers With Causes - Computers with causes evaluates each and every donation on a case by case basis. Whenever financially beneficial, computers with causes will repair, refurbish, and properly prepare donated property for placement into an educational environment or other cause we support. The ultimate goal being to maximize the benefit of your donations both financially and through educational purposes to the communities in which we live.
~ Educational Assistance LTD. - Educational Assistance Ltd. (EAL) takes donated computers and equipment and exchanges these goods for scholarships within a national network of accredited colleges and universities. All scholarships are designated for students with severe financial need.
August 27, 2010
Krazy for K-Railz!!
Okay, earlier this week, I told you that I would be telling you about a hot new product that is hitting the market. What is it you ask? They are called K-Railz, and the kids love them, and want them in every color! My girls have had the exclusive privilege of being able to wear them for the last week now. They have been wearing them, trading them with each other, and are particularly bummed that none of their friends have them. Why? They can't wait to trade colors with their friends! The exact words that came out of their mouths were, they thought they were going to be bigger than Silly Bands!

I'll admit, when I first saw these, I thought they were going to take 15 minutes or so, just to put them on your shoes. Boy I could not have been more wrong! In less than 5 minutes I had both my shoes done. K-Railz act just like shoelaces, they're pliable enough where you can slip your shoes on, without having to tie them, yet loose enough, where you don't feel like you have no circulation left in your feet. K-Railz don't loosen up throughout the day either! They will feel the same way from the time you put them on your shoes, until you take them off! Call it lazy if you will, I just hate tying my shoes, I hate, when I look down and see that my lace has come untied, and I really hate seeing my girls walk around with their shoe laces hanging down, untied, stuffed inside their shoes, or dragging behind them. K-Railz, solves that problem! AND, they aren't just for kids, adults sometimes have a difficult time bending over to tie their shoes, and will often reluctantly resort to buying those hideous Velcro shoes, that come in limited sizes and color. K-Railz solves that problem too!

You can't buy them anywhere except the website, so when your kids start to ask, don't say I didn't warn you! They come in a huge variety of colors and sizes, enough to accommodate just about everyone! Also, this is a must say, K-Railz are COMPLETELY, 100% Made in the USA! Every little piece is made in the USA, from the raw materials to the packaging! Not many companies or products can say that now-a-days! Having my previous job a become a victim of cheap labor overseas, I, myself try to look for labels that say Made in the USA. It's not easy.
Finding out your correct size is pretty easy too. Simply grab yourself a soft ruler, and with your foot inside your shoe, simply measure the distance between the eyelets in your sneakers. For example if you find out that the distance between the eyelets in your shoe is 1.80 inches, go up to the 2 inch size. Remember these are very pliable, and will sit correctly on your shoe pretty quickly. If you don't want the tongue on your shoe to move around, you can simply insert the K-Rail through the same hole on the tongue that your shoelace would go through.
I'll be posting a video this weekend showing my daughters installing them into their shoes, so you can see just how easy they really are.
Want to win a pair? Head on over to the K-Railz site, check out the colors, and leave me a comment telling me what color you like.
Want an extra chance to win a pair?
Tweet about K-Railz, come back and leave me a comment letting me know you tweeted!
Winner will be chosen by Random.org on September 6th at 12 Noon.
November 05, 2009
Smart Phones... Which is Better?

I was recently in the market for a new phone. With so many choices out there, I wasn't really sure which phone I wanted. I did however know what I liked, and what I didn't like. I had a mental list of what I needed and wanted. Which, believe it or not, are two completely different lists. I had the iphone already, and though I loved it, we have TMobile, and had to do a lot of things, in order for it to work with TMobile. and at that, it still didn't work as well as I wanted it to. The apps, are great, and literally, there are thousands of apps to choose from, many of which are free, some are very helpful, and others, are just for fun.

Now before anyone emails, and tells me that they love their Blackberry, let me first say, I learned in the first day, you are either a Blackberry person or you're not. I am not. I hated this phone. I did not like the keys, I hated the fact that I had to hit the "alt" key in order to get the other keys, such as the question mark, period, colon, etc. This was not the phone for me, and I new that 20 hours into having it. The one thing I did like about this phone, was the email feature. You could choose to delete the email from either just your phone, or both the phone, and the actual email account. So needless to say, the very next day I brought the phone back, and did a little more looking.

That's when I came across the My Touch, I looked, felt, and tried. I was hooked! I told them, I wanted to try that one next! the rep just laughed at me. I walked out of the store, with my new My Touch. it only took me a few hours to realize that this was the phone for me. It has everything I needed, and everything I wanted. The only fault I could find with this phone was unlike the iPhone, in order to switch the phone to it's side, you can only turn it one way. The iPhone, changes no matter what direction you turn it. The My Touch has just as many apps as the iPhone, or at least it seems that way, same great touch screen, and feel, but a little more user friendly.
So if your in the market for a new phone, I highly suggest doing your homework on at least three models that peak your interest, because what works for me, may not work for you. It comes down to nothing but preference. All the phones I tried were great phones, but what can I say I'm human, and have my favorite. I will say if you're planning on "trying" out phones like I did, be prepared to pay a small restocking fee. I know, it's not very frugal, but I wanted to make sure I got the right phone for me, well worth a little restocking fee. Also, go directly to a local verizon, AT&T, or TMobile store, and not a registered dealer of one. The reps are more informed, and know about fees upfront, and will even help you determine if your on the best plan, for your needs, just ask.